AlienGo simulation was an interesting journey. But the moment you see it walking, you can’t help but wonder… will it actually work in the real world?
Let’s buy a real one and test it in real life!

Well, you know what? Maybe we should stick to small DIY projects for now. How about starting with a 3D-printed leg? Recently, I designed a replacement button for an egg cooker. So, I figured it’s time to level up my design skills. Can I design the simplest robotic arm possible?
Before jumping into the design, here’s what I want: a small microcontroller and the cheapest servos I can find. I also don’t want to use any additional materials beyond screws—no bearings, no glue, nothing extra.
Designing
With those constraints in mind, I searched online to see if there were any similar robots. I found a really nice YouTube channel called tang, and watched almost every single video on it for inspiration. Here’s the leg I came up with:

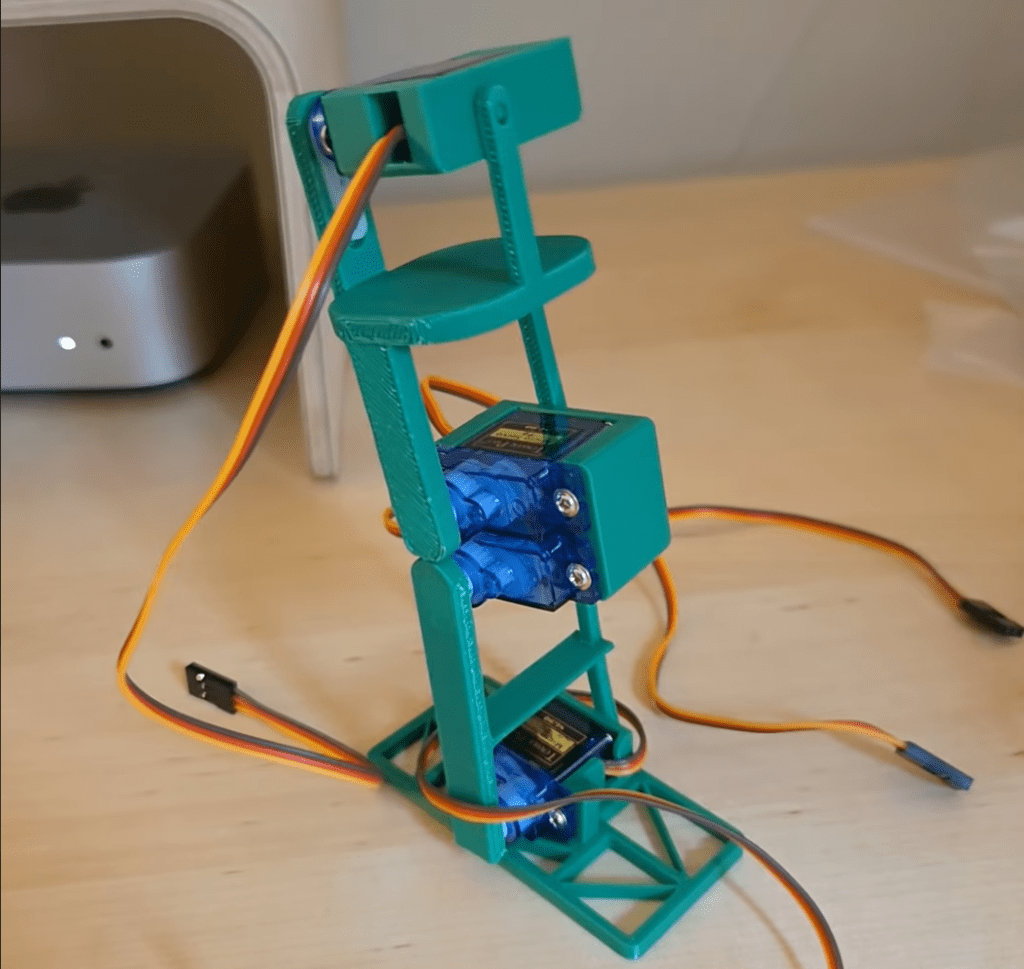
As I mentioned, I didn’t want to glue anything or use bearings. So, I took advantage of PLA’s bendability (first time using that word). On the right side of the leg, you can see a very thin joint section—it’s flexible enough to snap into place, yet stiff enough to stay there. Still, it can be disassembled by hand when needed.
I printed this leg to check for any problems. It looks like everything is in the right place:
The final design

It looks a bit chunky—but don’t judge me! My previous (and first) design was literally just a button. Working on this taught me a lot about Fusion’s features. Before this, all I knew was how to sketch and extrude. 😄 Naturally, this lack of experience came with its own set of problems. I had to iterate and reprint the design a couple of times to understand how to get the best results from a 3D printer and make the assembly phase as smooth as possible.
Soldering
Up until this point, everything felt like fun and games. I was just using jumper wires, pins, and headers like in typical Arduino projects. But now that things are getting more serious, I had to actually solder components together. For this build, I soldered the ESP32 D1 Mini, an IMU module, a couple of SG90 servos, and a DSN Mini 360 buck converter. It wasn’t perfect (far from it!), but it worked.
In the following photo, you’ll notice I used heat shrink tubing. It’s not only for insulation, but also to hide the chaotic mess I made with my soldering. You can use your imagination and pretend there’s a perfect soldering job underneath.

What’s next
So now we have a 3D design, and surprisingly, the electronic components seem to work in real life too! But our job’s not done yet. To bring this robot to life in a simulation, we need to go back to the digital world.
If we tried to drop this design directly into PyBullet, it wouldn’t make much sense. That’s where URDF comes in. URDF stands for Unified Robot Description Format—basically a blueprint that tells the simulator how your robot looks, how its parts are connected, and how it moves.
We will convert our Fusion 360 model into a URDF so we can simulate movement and train our robot.
That’s the next adventure, see you there!

Yorum bırakın